步驟與藍圖
- Line developers創建provider、channel
- Messaging API and a SDK for Python
- Heroku作為LineBot server
Line developers創建provider、channel
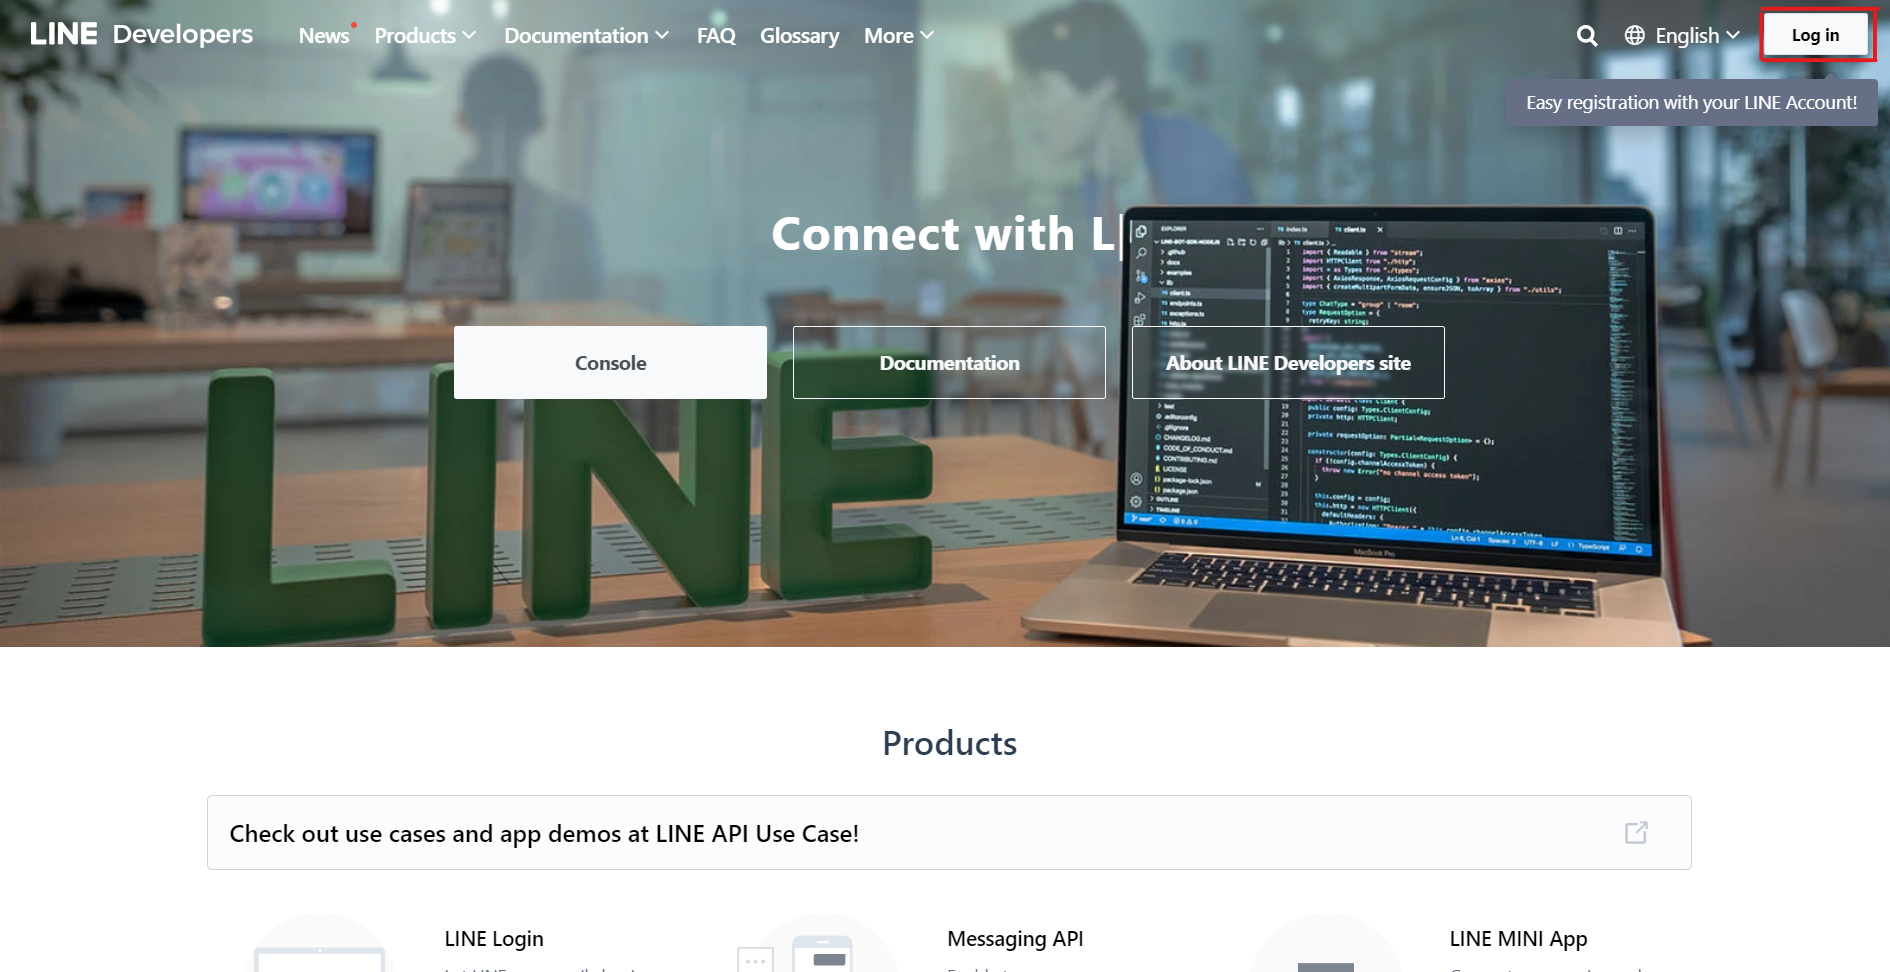
到Line developers主頁點選右上角Log in,登入自己line帳號:
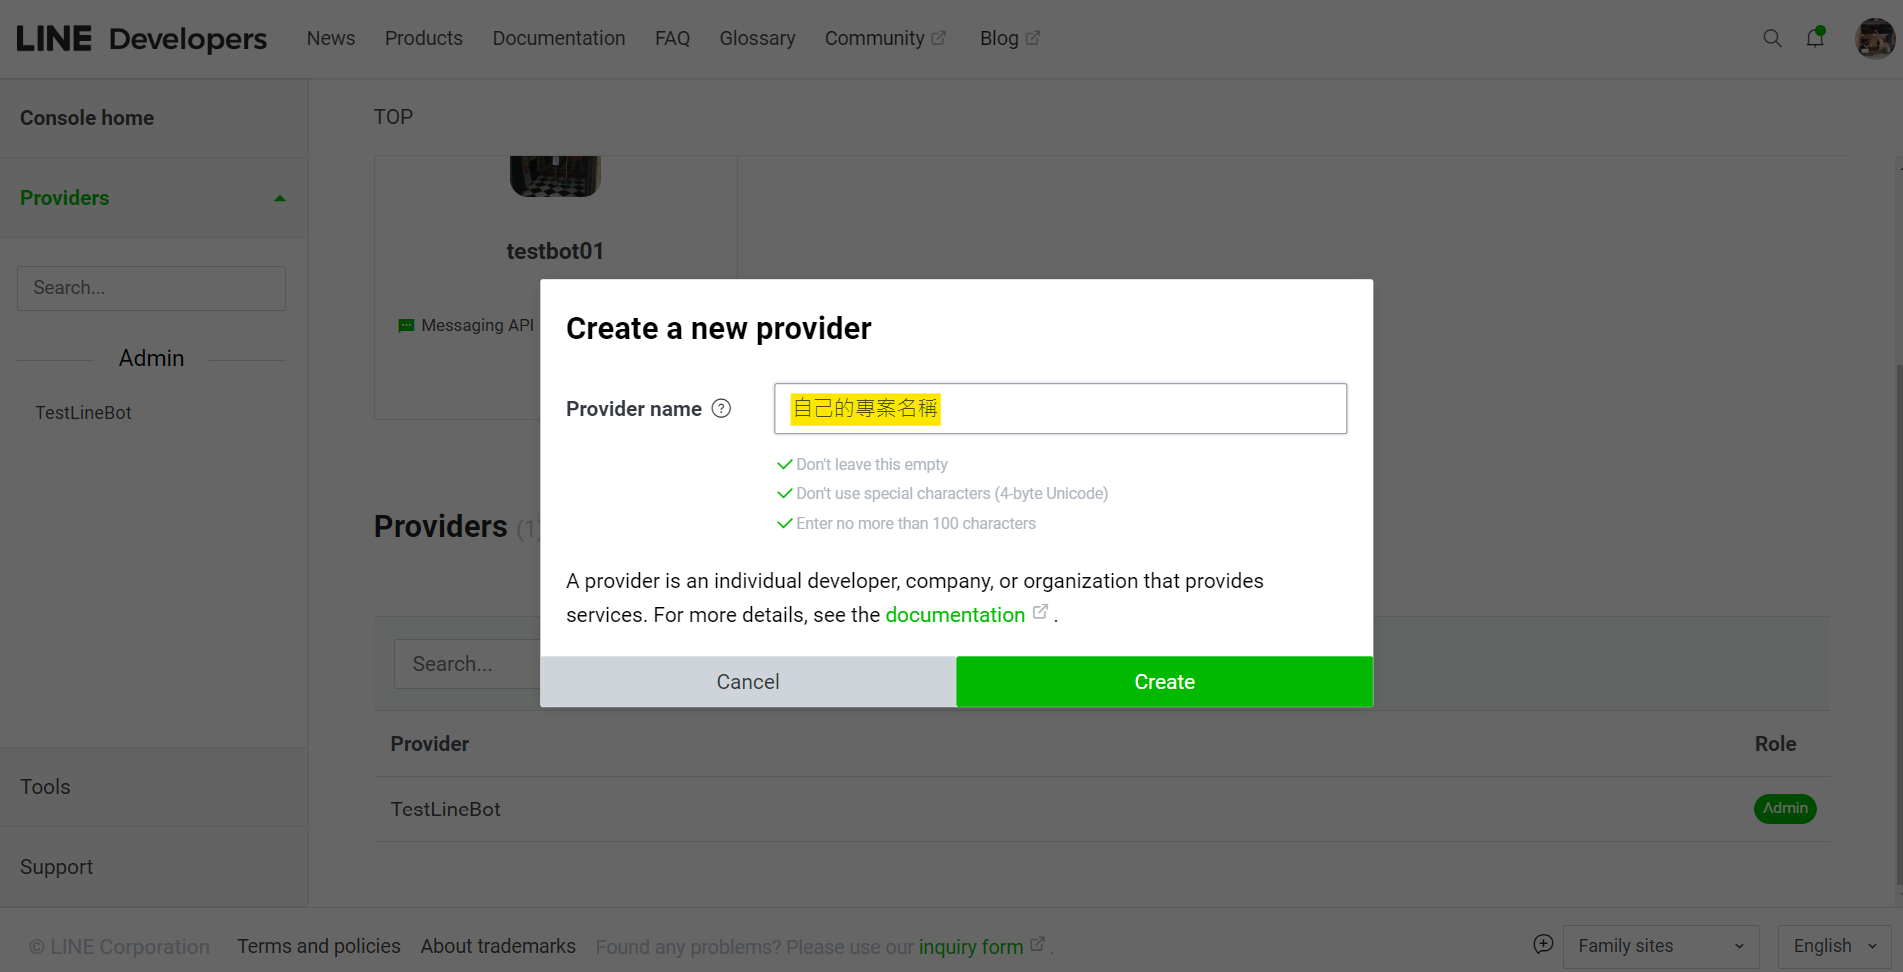
點選畫面上Providers旁的Create,並在Provider name輸入自己專案名稱(例如TestLineBot):
創建完provider後可以看到左邊bar上有剛剛創的專案,點選後我們來創建channel, 直接選擇Create a Messaging API channel,作為聊天機器人使用。
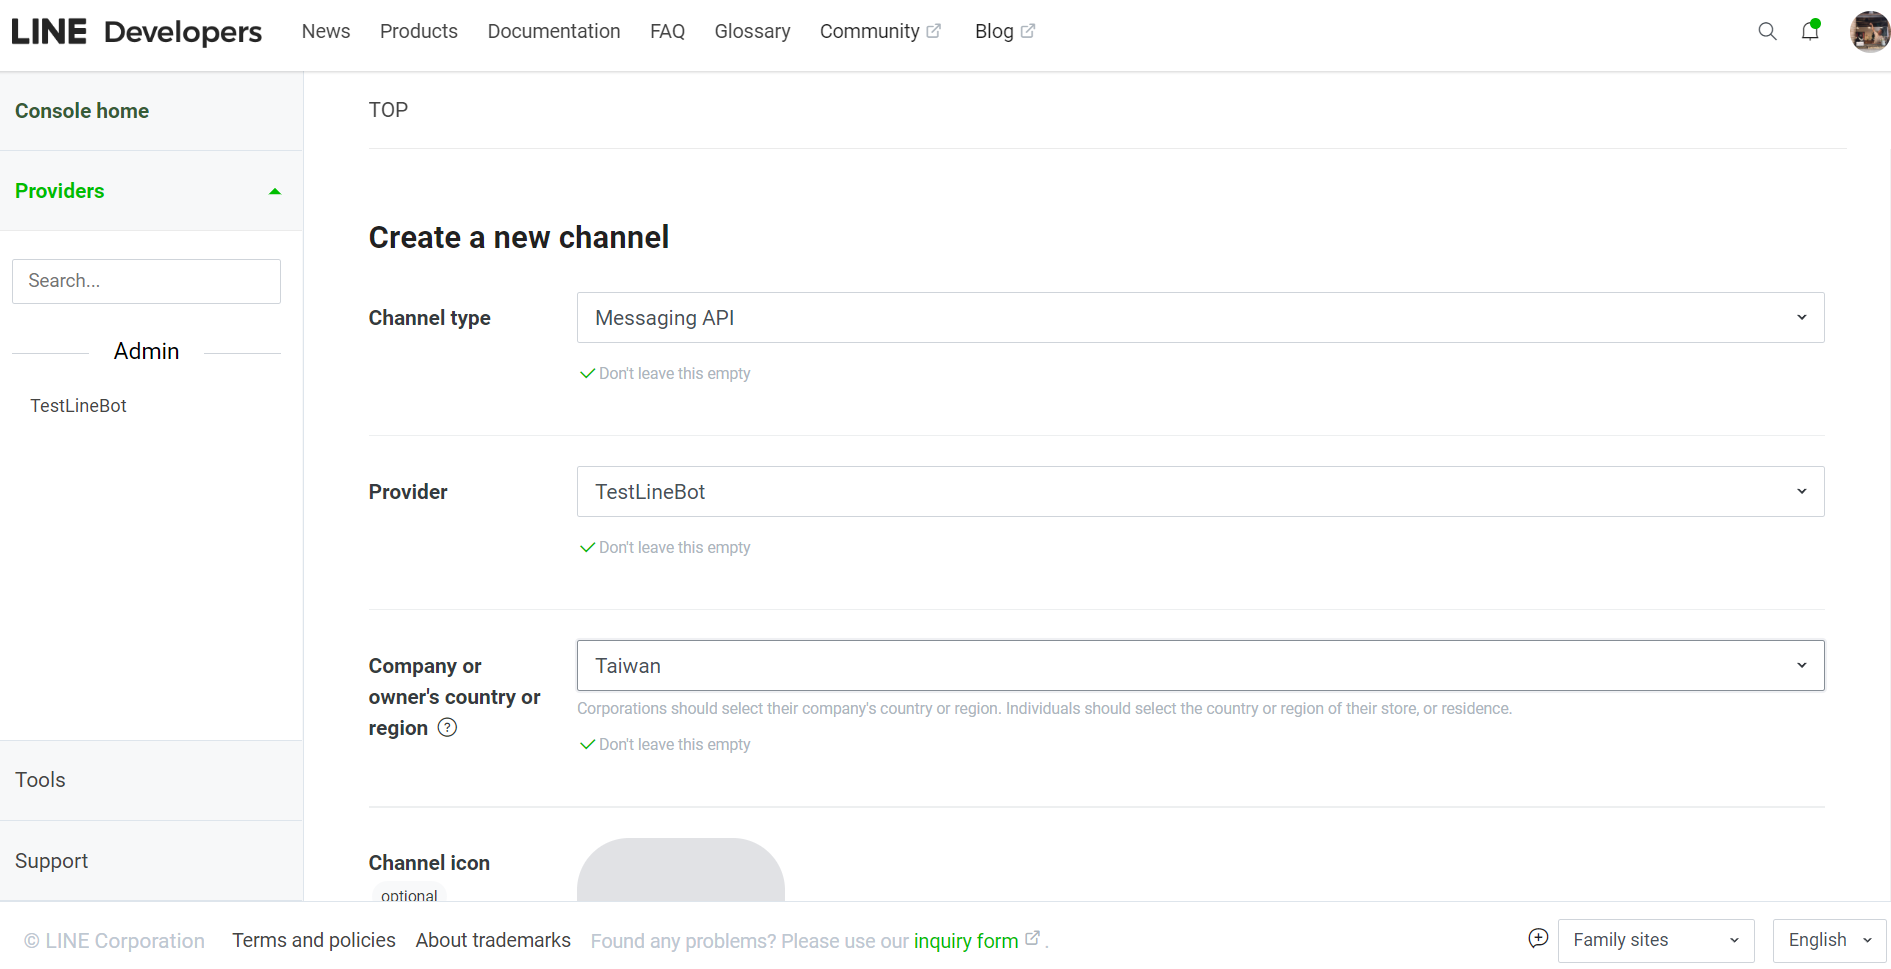
在Create a new channel底下可以設定icon(line大頭貼)、name(line名稱)等資訊,最後勾選同意使用條款,然後創建。
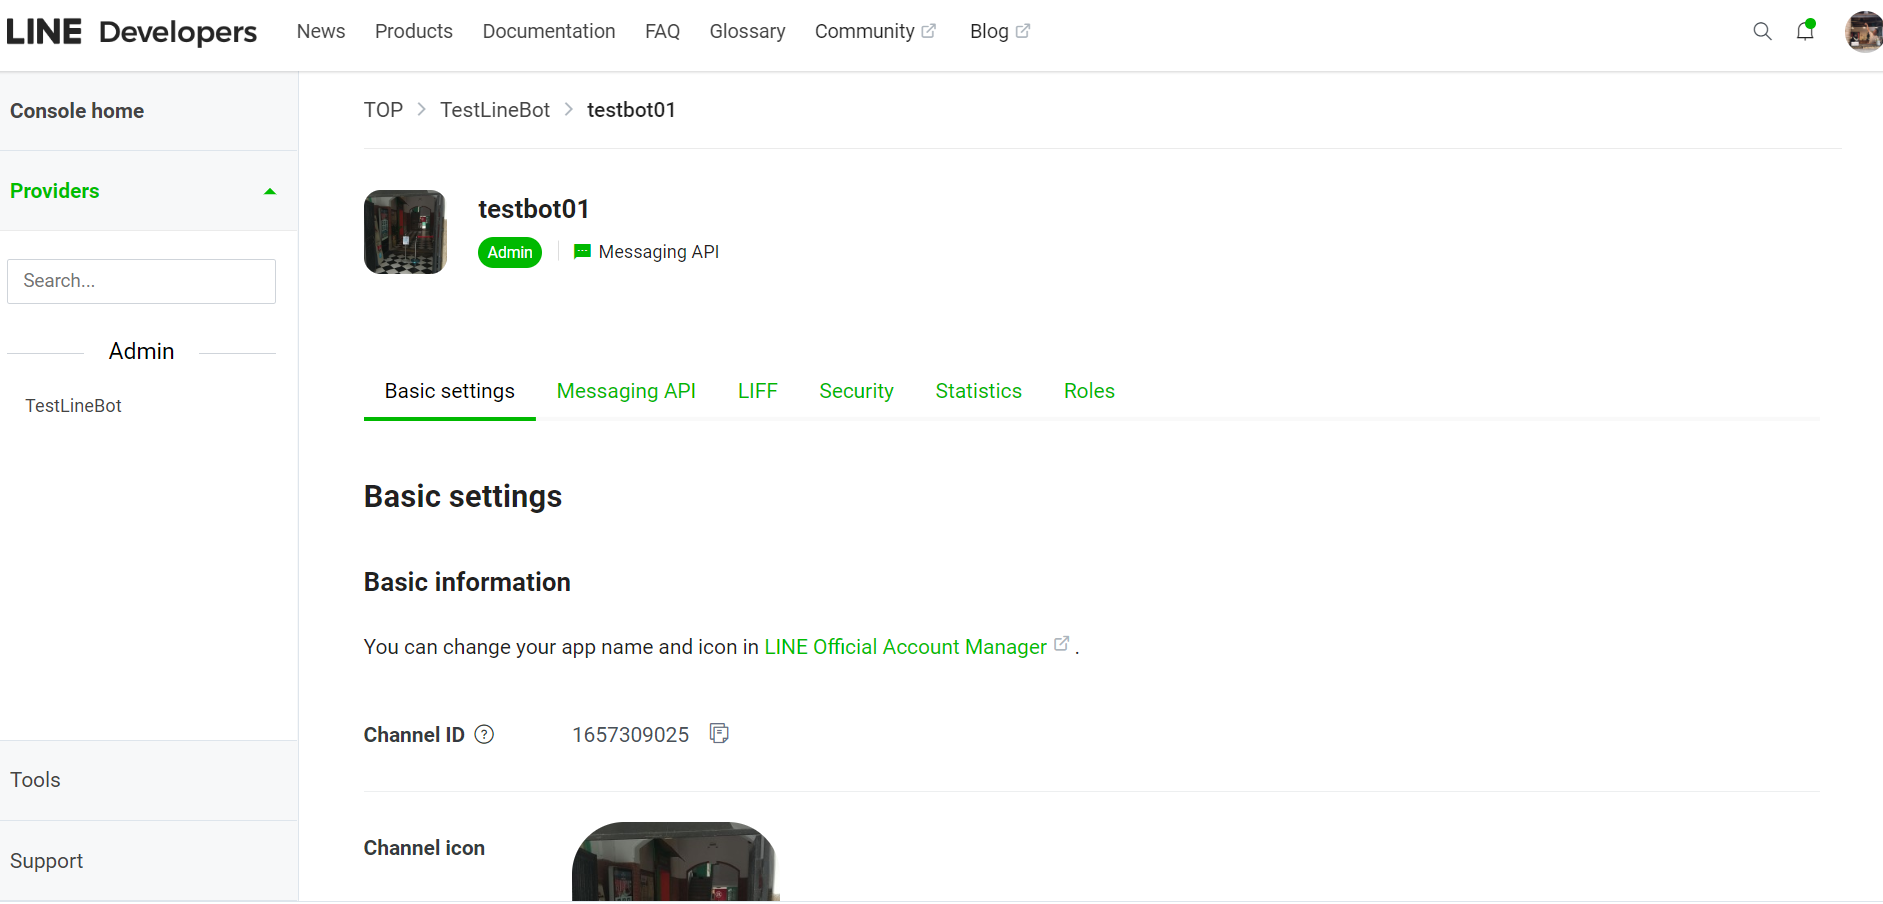
這裡有幾個重要資訊,分別是:
- Basic settings
- Channel secret (A unique secret key you can use to grant an app access to your channel)
- Your user ID (Your LINE account’s user ID. Use this to send yourself test messages with the Messaging API. Doing so requires you to add your channel as a friend on LINE by scanning the QR code on the Messaging API tab.)
- Messaging API
- QR code
- Webhook URL
- Channel access token (Use this channel access token to call the Messaging API.)
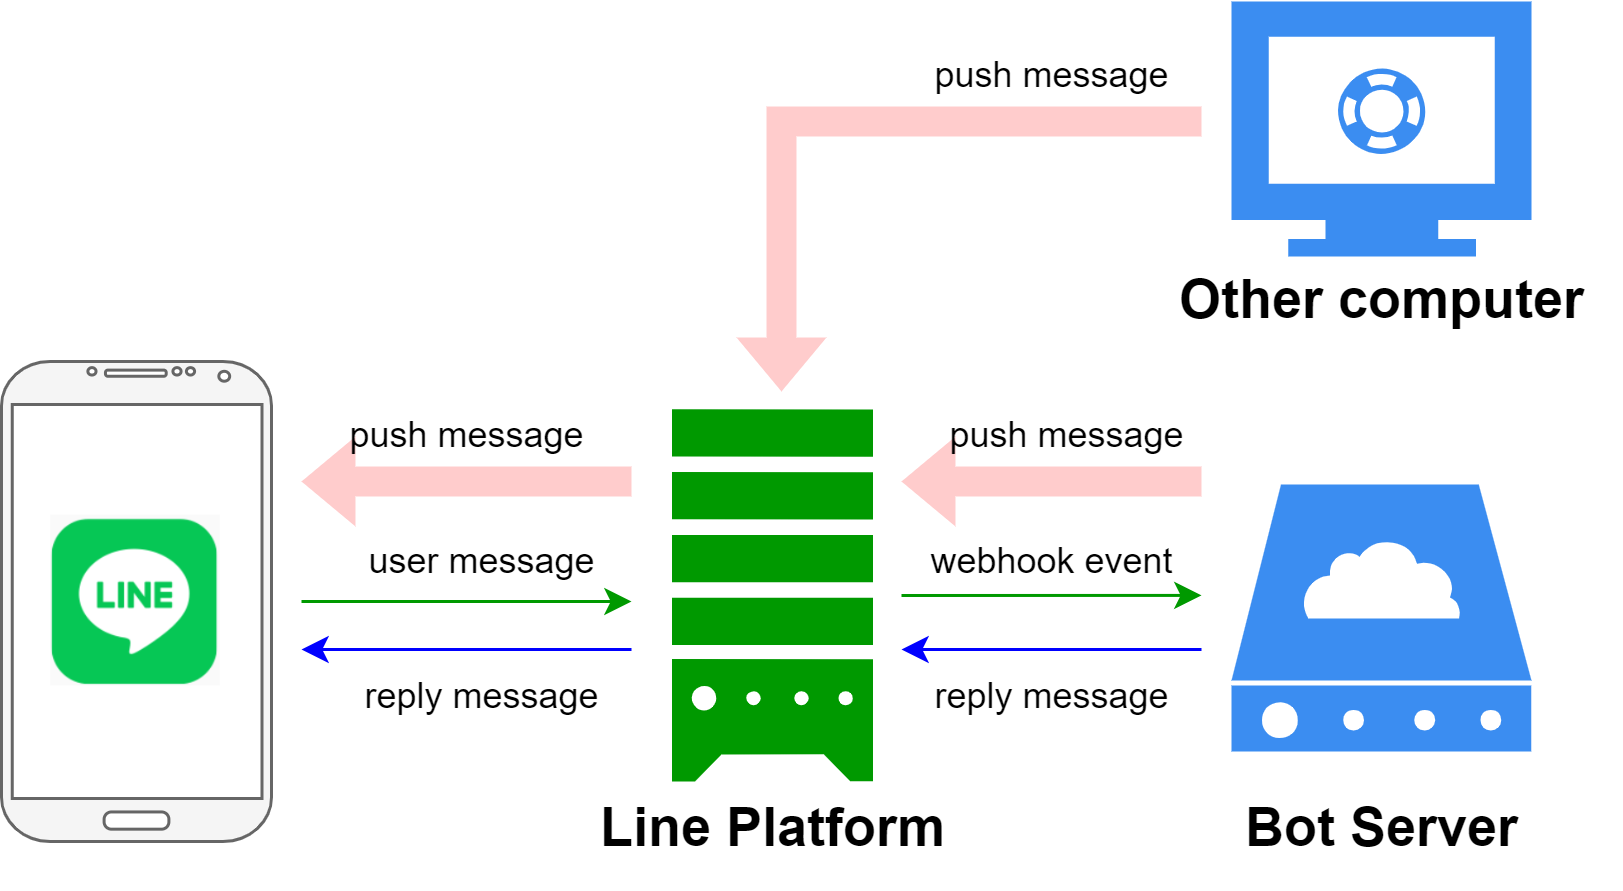
Messaging API and a SDK for Python
Messaging API 提供push messages和reply messages兩個方法讓聊天機器人與使用者互動。
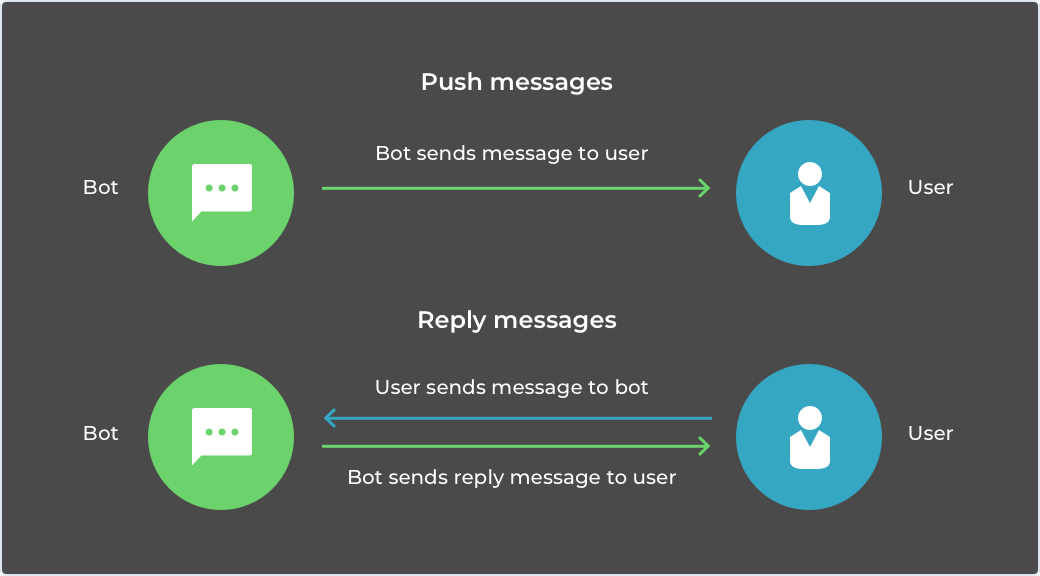
其中開源的LINE Messaging API SDK for Python 讓我們可以使用Python開發自己的聊天機器人(回覆訊息、推播訊息)。
# python >= 3.7
pip install line-bot-sdk
創建檔案app.py來編寫聊天機器人的push messages和reply messages。其中,這裡用Flask架一個app作為LineBot server的溝通方式。並且,剛剛重要的Channel access token、Channel secret、Your user ID分別設定給LineBotApi、WebhookHandler、push_message:
import os
from flask import Flask, request, abort
from linebot import LineBotApi, WebhookHandler
from linebot.exceptions import InvalidSignatureError
from linebot.models import *

app = Flask(__name__)

# 必須放上自己的Channel Access Token
line_bot_api = LineBotApi('Channel Access Token')
# 必須放上自己的Channel Secret
handler = WebhookHandler('Channel Secret')
# 使用Your user ID推播訊息
line_bot_api.push_message('Your user ID', TextSendMessage(text='你可以開始了'))

# 監聽所有來自 /callback 的 Post Request
@app.route("/callback", methods=['POST'])
def callback():
    # get X-Line-Signature header value
    signature = request.headers['X-Line-Signature']
    # get request body as text
    body = request.get_data(as_text=True)
    app.logger.info("Request body: " + body)
    # handle webhook body
    try:
        handler.handle(body, signature)
    except InvalidSignatureError:
        abort(400)
    return 'OK'

#訊息傳遞區塊
##### 基本上程式編輯都在這個function #####
@handler.add(MessageEvent, message=TextMessage)
def handle_message(event):
    message = TextSendMessage(text=event.message.text)
    line_bot_api.reply_message(event.reply_token,message)


if __name__ == "__main__":
    port = int(os.environ.get('PORT', 5000))
    app.run(host='0.0.0.0', port=port)
Heroku作為LineBot server
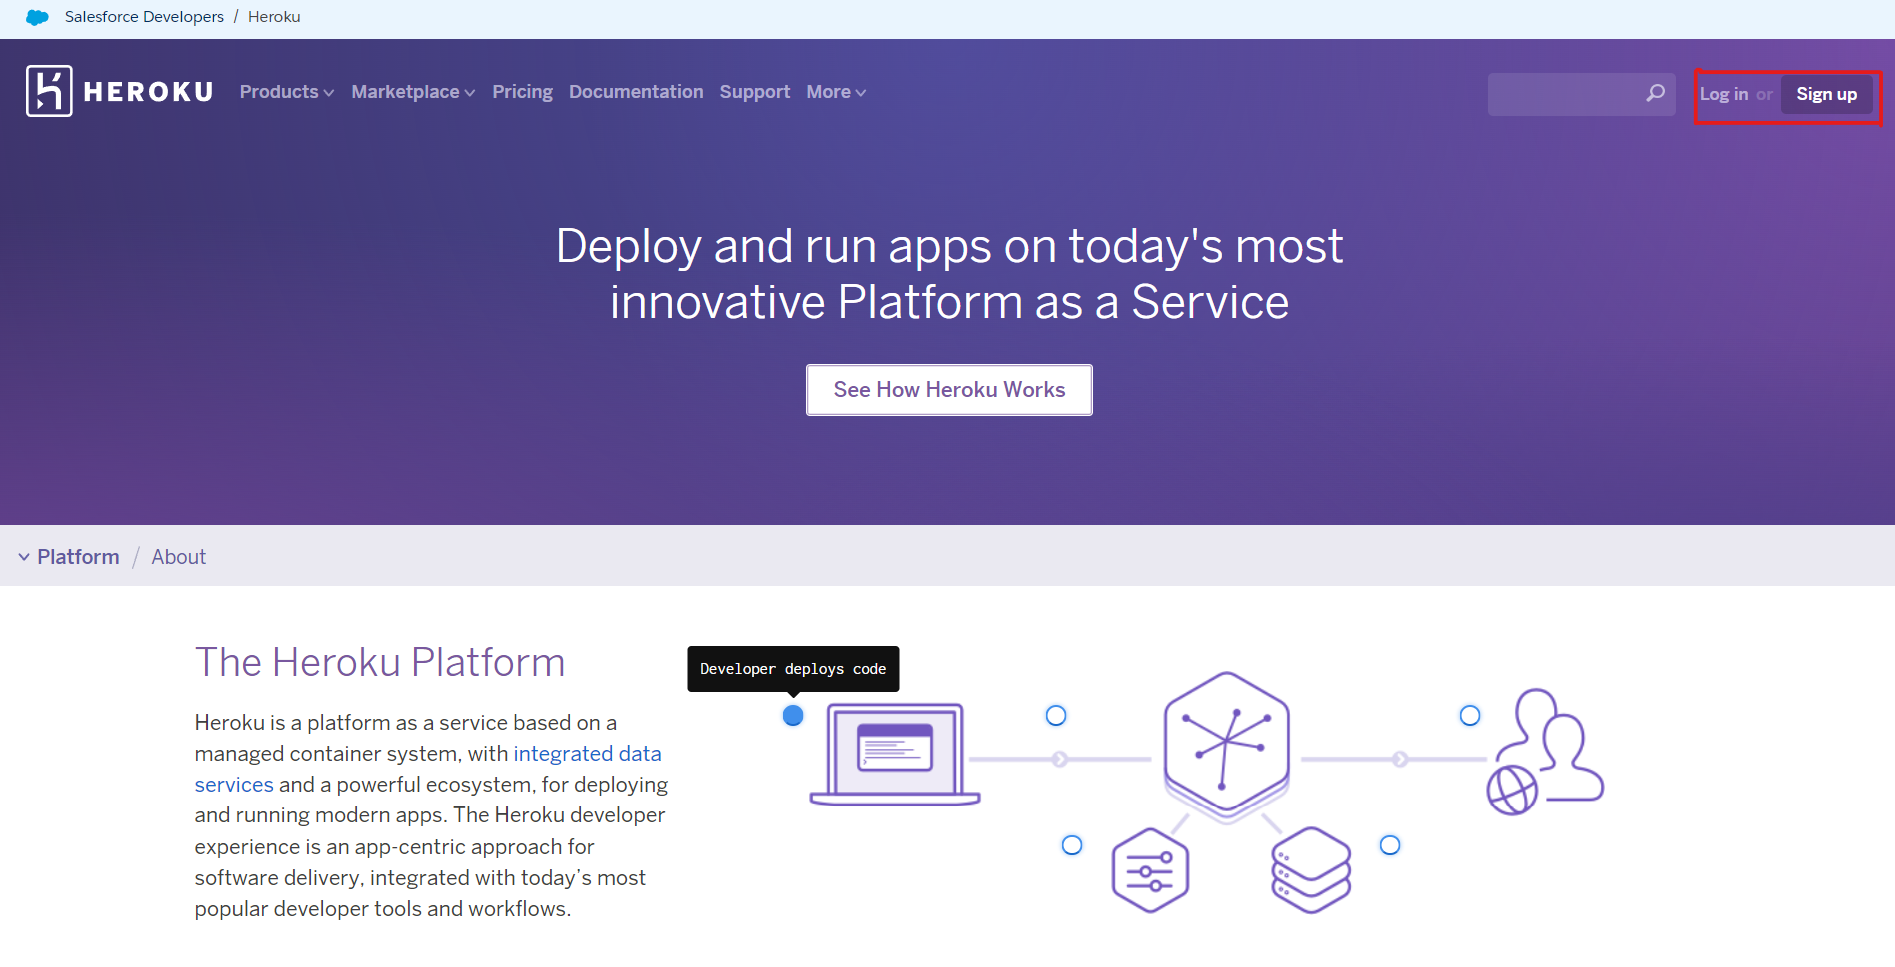
到Heroku主頁右上角選擇Sign up(或Log in),最後登入你的帳號:
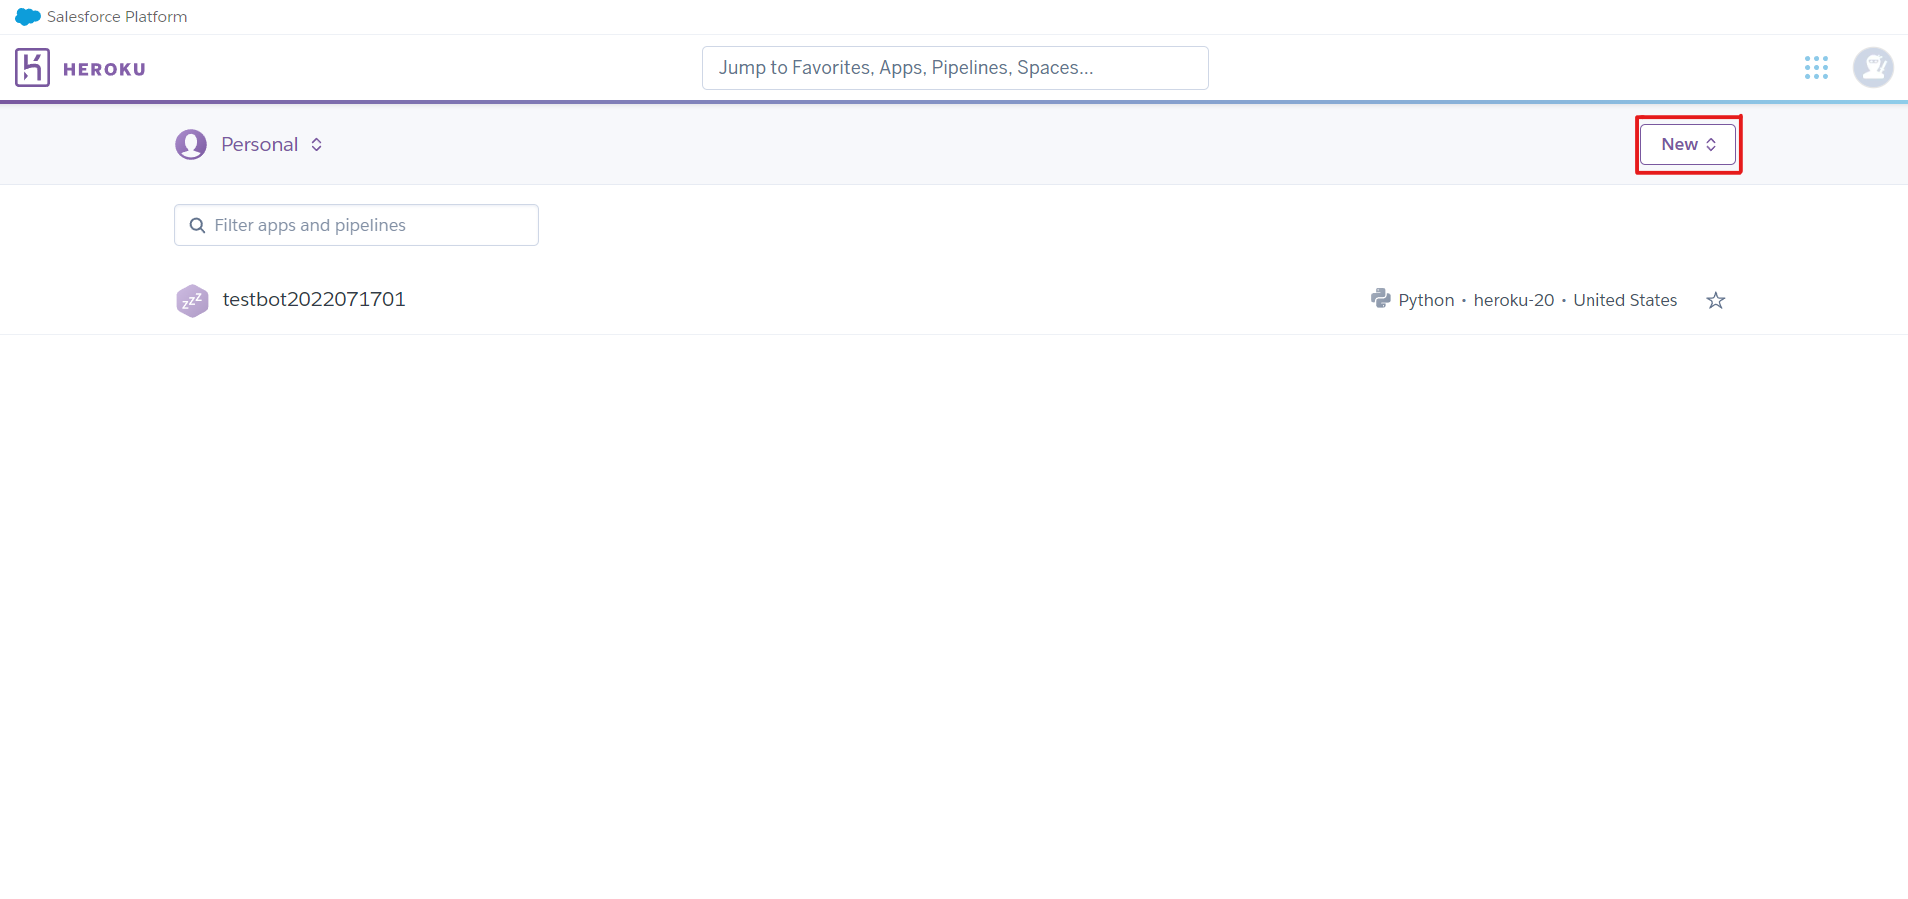
這個頁面會顯示你在Heroku目前所有app。透過右上角New > Create New App來創建新的app,輸入App name、選擇region就可以了:
創建好Heroku app後,我們需要設定Line Platform和Bot Server(Heroku app)溝通橋梁Webhook。進入你的Heroku app,點選Open app:
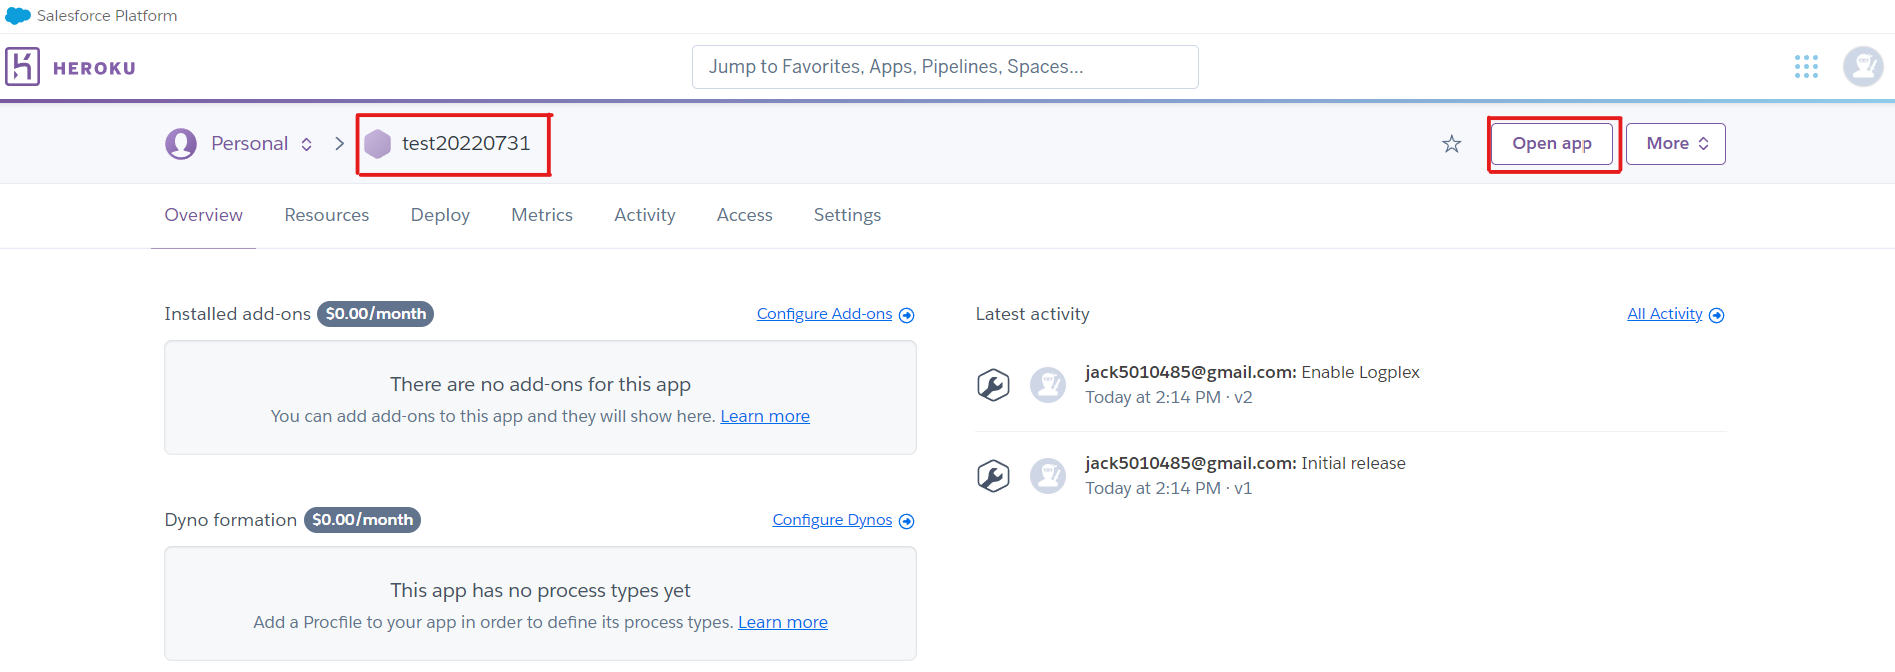
然後複製這段網址(包含https:://):

回到Line Developers,打開Providers進到你的channel並點選Messaging API頁面(TestLineBot > testbot01 > Messaging API),往下滑到Webhook settings貼上剛剛複製的網址,並在後面加上/callback,完成後點選Update,並開啟Use webhook。
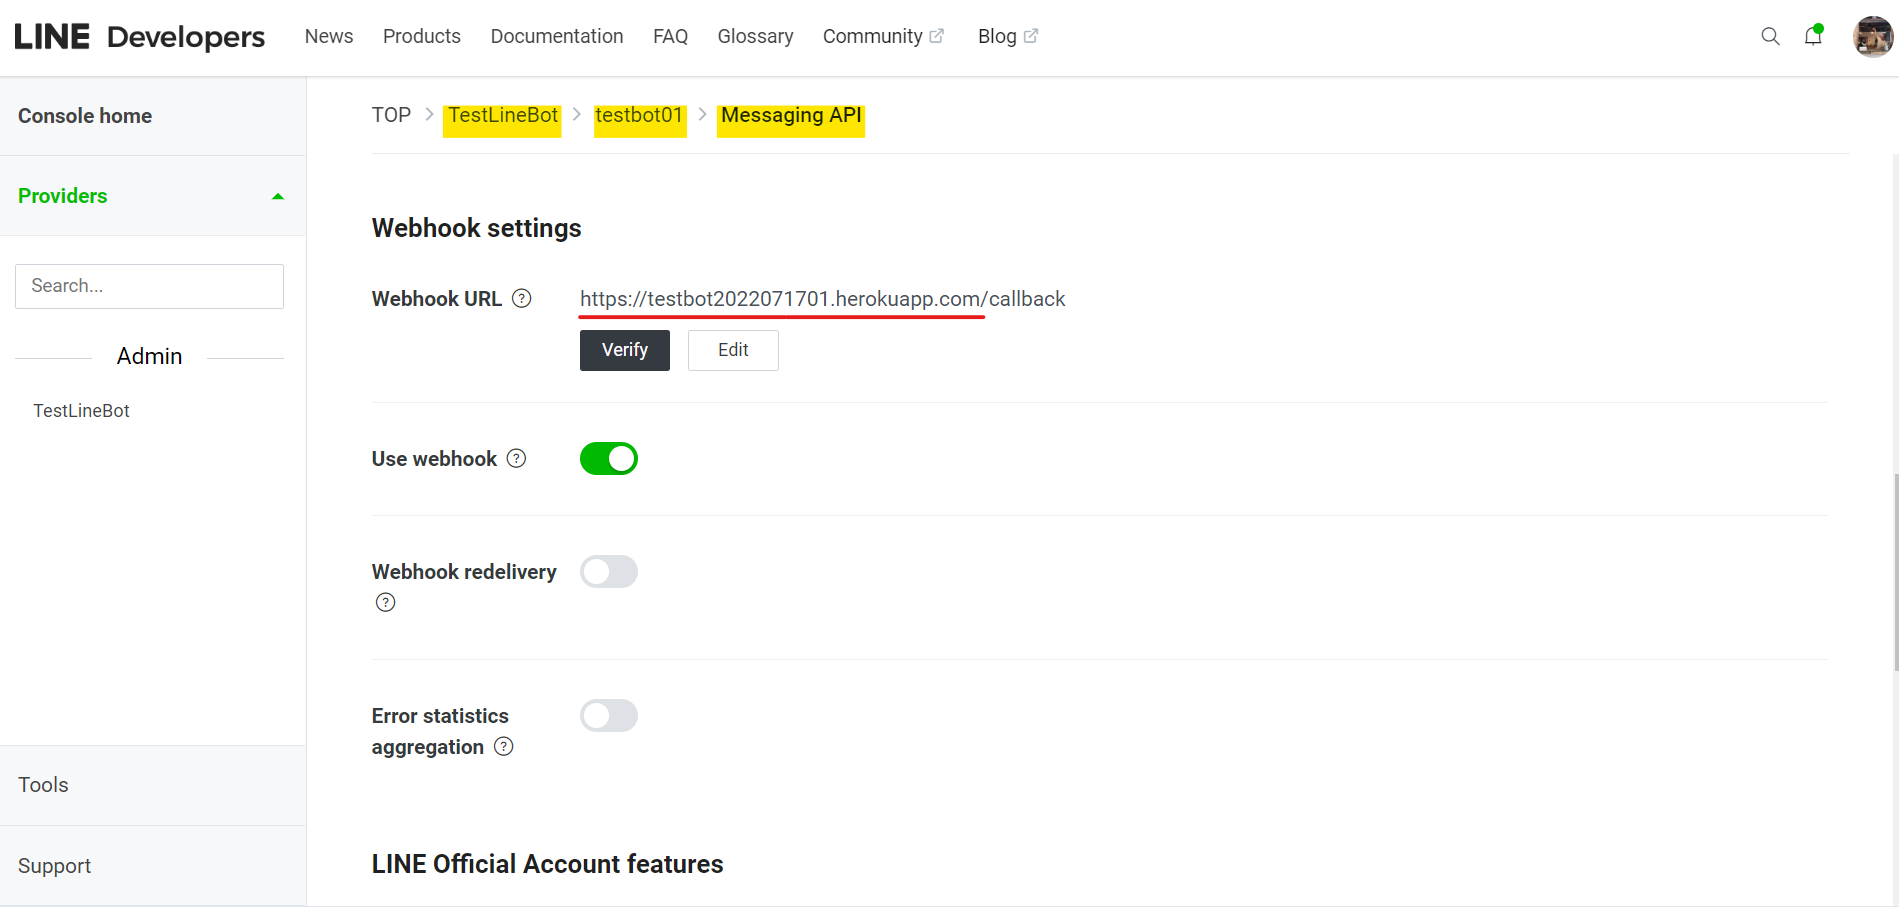
建議在LINE Official Account features的Auto-reply messages可以選擇關掉Disabled,否則聊天機器人每次都回多回覆一些罐頭訊息,像是:感謝您的訊息!很抱歉,本帳號無法個別回覆用戶的訊息。敬請期待我們下次發送的內容喔)。
完成Line Platform和Bot Server的橋樑後我們可以開始部屬程式。這裡要將三個檔案放入剛剛創建的Heroku app裡:
- app.py (line bot主程式)
- Procfile (告訴Heroku要執行什麼e.g. python app.py)
- requirements.txt (安裝環境套件)
其中,app.py如上節所示,而Procfile如下:
web: python app.py
與requirements.txt:
line-bot-sdk
bs4
flask
pymongo
datetime
pandas
SnowNLP
emoji
pyshorteners
scipy
我們選擇github作為部屬程式到Heroku的管道。另外,這裡就不介紹如何創建一個repository並把剛剛3個檔案push上去了,記得選擇private repo,因為有你的Channel access token、Channel secret資訊在上面。
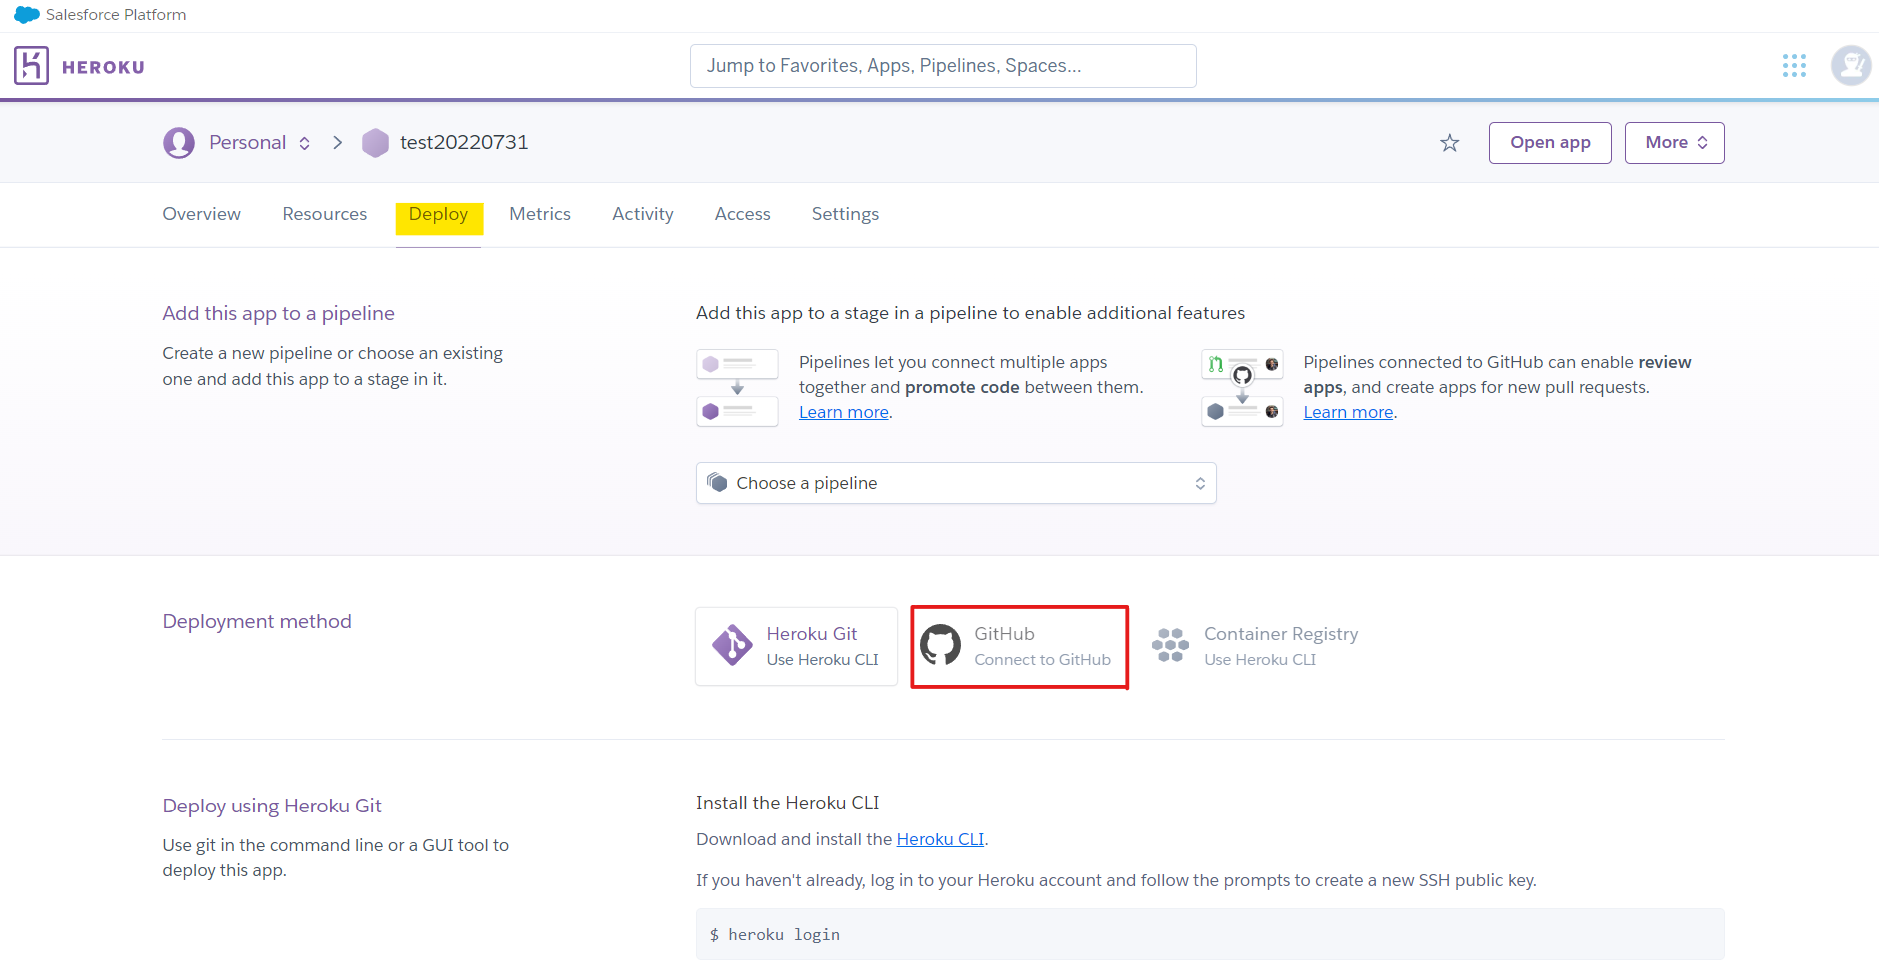
輸入你的repository name然後connect,接著畫面拉到下面,點選Deploy Branch就可以把(repo裡面的code)app.py、Procfile、requirements.txt部屬到Heroku app了。
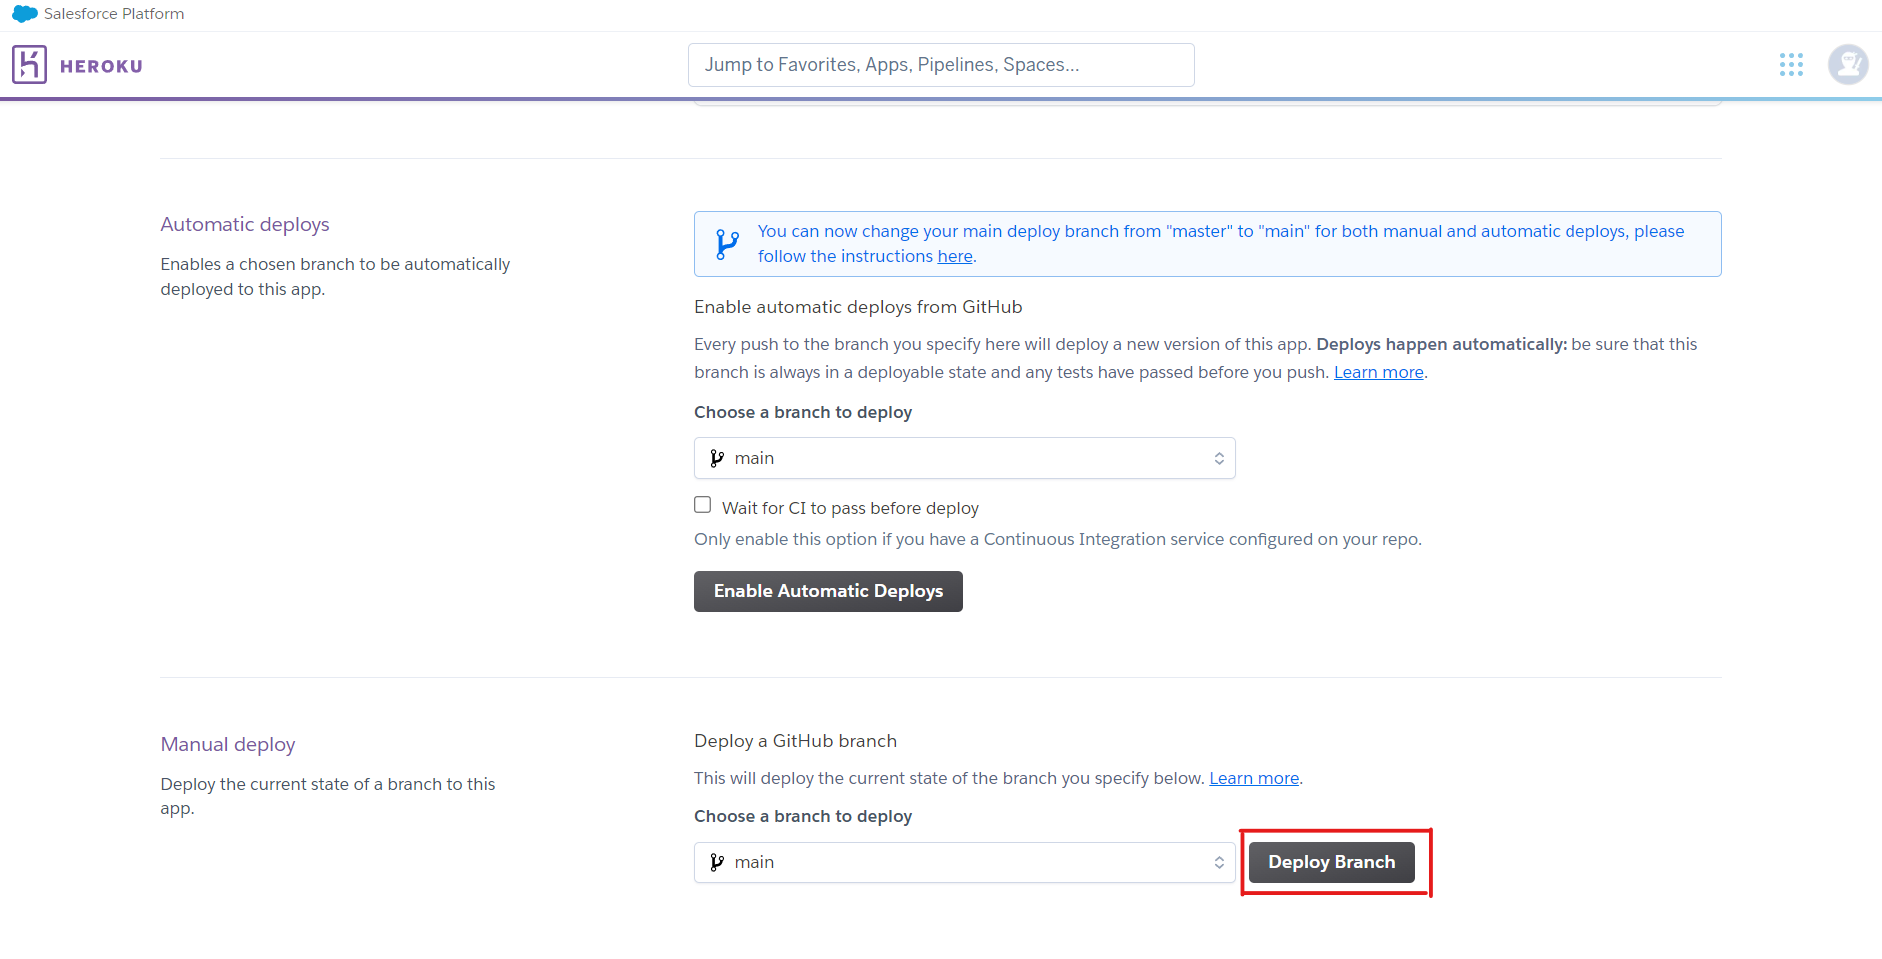
當部屬成功完成後,Heroku app就會幫你執行python app.py,照理說,這時候你的line bot就會發出一則推播訊息:「你可以開始了」。
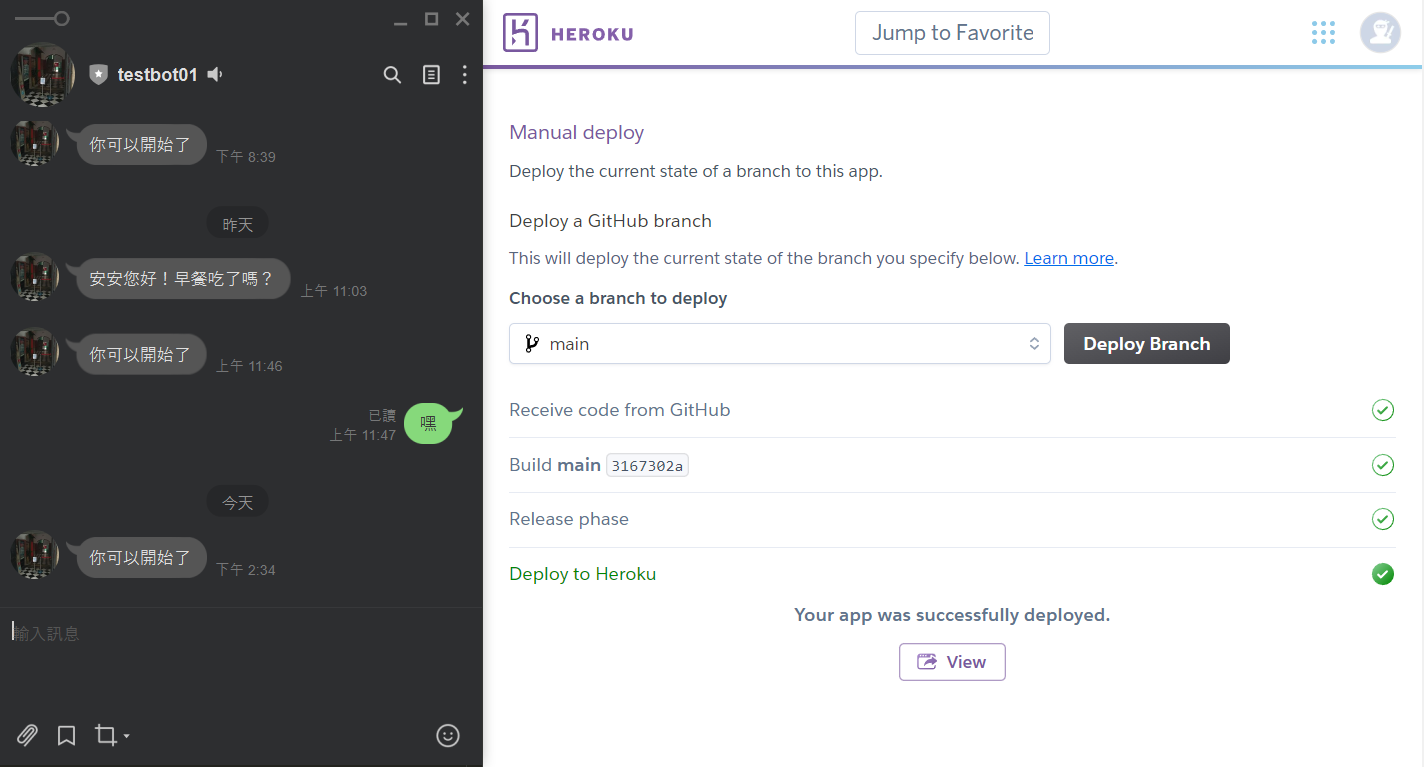
代表push messagest成功!而當你輸入任何訊息,Line Bot都會回覆相同訊息,代表reply messages成功!另外,這兩個方法都可以在app.py裡修改,創造出你想要的聊天機器人。

Next
- 修改reply messages的邏輯。
- 新增reply messages的種類:文字、貼圖、圖片、影片、聲音、位置等。